

How to Setup Cubase 5.x
OVERVEIW (see below for more details)1. select "ADSP24 ASIO" driver
2. Enable Inputs
3. Enable multirecord
4. Go to "audio" "master" and make sure that at the bottom of the fader the output you wish to use is selceted.
5. Check External links program
6. Set buffer ratio to 80% (the latest drivers do not have this anymore, please ignore this step)
7. Hold down "CONTROL" and select the input on each track
8. Record "Enable" each track
9. Press record
10. Have fun.
Long Winded Setup
Under winXP and win2000 this step is VERY IMPORTANT. go START>PROGRAMS>STEINBERG>setup mme , then disable the "Microsoft software synth" from loading with cubase. Alternatively you can leave the synth enabled and set the windows perferred playback device to the INT drivers. With the newer multiclient drivers you have another option to setup one output pair as MME. If you dont do this step then you will experience problems when selecting the ASIO driver.
To setup the Drivers in Cubase 3.7 go to "audio" / "system" ...this will differ depending on your version of cubase, you are looking for this window that looks like this....For cubase 5 go to "options" "audio setup" "system" a screen similar to the following will open.
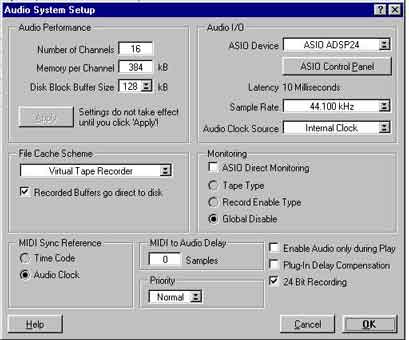
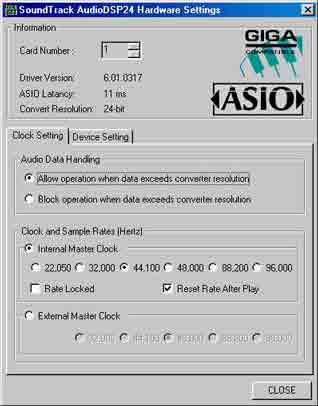
In this window you can set which type of driver you use. I recomend the "ASIO ADSP24" since this will give you the best performance both stability and latency. Under this setting is the ASIO CONTROL PANEL if this doesn't open up or is unreliable then you need to read my updating drivers page. The disk block buffer size should be the amount of free RAM that you have. The number of channels will default to 8 or 16 because the computer needs to researve resourced for these tracks even if not in use..Dont set this to 50+ tracks unless you can and do use them. The monitoring section here is where you decide if you monitor the input or the waveout, This is separate to External links and does a similiar job. Tape type will give you low latency but you wont be able to record and monitor with an effect in real time..You'll soon see what I mean. Setting up the monitoring section is dependant on your setup and how u like to work. There are other settings to allow for delays with your midi and directx / vst effects. These help your tracks stay in sync with each other and your midi. These are different for evey setup. Leave it similar to the above picture until you have it working then try to tweak the settings.
 |
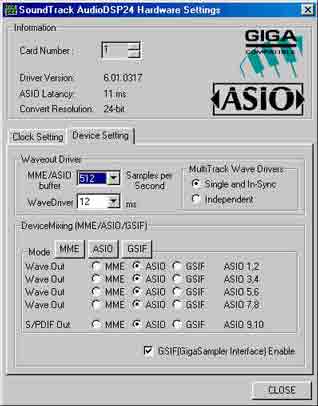 |
The waveout driver "MME/ASIO buffer" gives the CPU time to process the audio thats why you get a delay known as latency. Set this too low and u get pops and clicks. 1024 is what I would call a safe setting, If u need to raise it up here you could need to defrag your HDD or optimise about 100 different settings, will be writting a page on this. I wont get into multitrack wave drivers in this tutorial.
After clicking appply and ok on the above pages then goto "Audio" "Inputs" In cubase 5 this is found under "panels" "vstinputs"
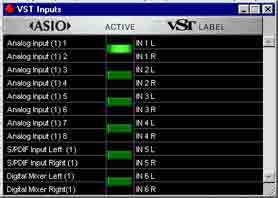
This activates the ASIO drivers allowing you to record more than 2 in at one time..Only activate what you need since once again selecting them means resources are allocated if if they are not in use. The number in brackets refers to which DSP24 card the input belongs to, since you can put up to 4 cards in the one computer.
TIP On the right hand side you can edit the name so that cubase displays any name you wish for each input..I have named then "CPORT IN1" "CPORT IN2" ect..
Thanks to sound and music for this next part since they saved me from writing it
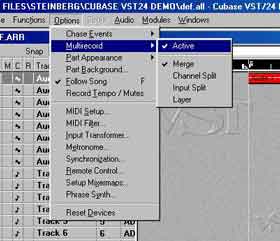
4. Setting
multi record to active.
To be able to record multiple tracks of audio from different wave drivers
(Different hardware source inputs), you must make sure that you have checked
the Multi-record option to active. It should look like below.
5. Record enabling an audio track and selecting the input driver source
of the signal you wish to record.
To be able to record you must enable a track for recording.
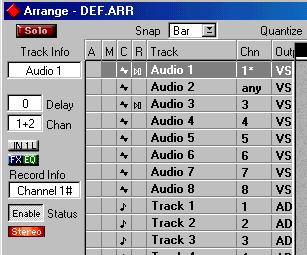
To arm a track for recording you must do four things.
1. Select the track you would like to record audio on.
2. Enable the track by depressing the Enable button in the Track info
display.
3. Select either a Mono or Stereo recording track. You may toggle the
switch between the two options.
4. Select the input driver source. Where you want the signal to come from.
Step four can be done in two places.
A. The track info window
B. The Audio monitor window
You must hold down the Control key on the windows keypad while you click
on the input source. A drop down menu will appear and allow you to select
the appropriate driver. The drivers that will be available for selection
are the ones which you have setup as active in section 3 of this guide.
5. Setting input levels.
To see and know where to adjust your input levels to you will need to
view the signal strength coming into Cubase. Go to the Audio Monitor
Window and depress the In button at the top right corner of the volume
fader for the track you have armed for recording. Play some test signal
to experiment and adjust your settings. You will now see the input signal
strength coming into Cubase from the particular input source you have
selected (You can see the input source driver at the very top of the channel
strip).
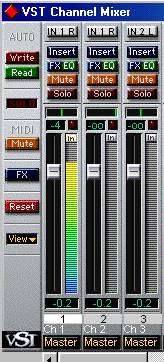
Check to see you have sufficient level without overloading. Adjust your
levels from the source. You cannot set the input gain from within Cubase.
Make your changes from where the source signal is coming from (mixer,
keyboard, mic pre-amp on C-PORT CH1 or 2, etc..).
5. Start recording.
To begin recording, click the record button on the transport window.
ADDITIONAL NOTES:
1. The C-PORT allows direct inline monitoring. This enables you to monitor
the live input signal directly through your hardware with ZERO latency.
You can set our monitor both input and wave playback levels levels through
the C-PORTs 1 & 2 outputs and control the volumes of each via the
External Mixer software provided.
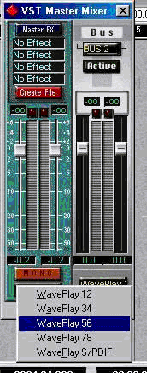
2. Separate outputs for individual tracks, groups or busses are assigned
by selecting the desired output driver from the bottom of the appropriate
channel strip.
TIP Dont forget to
save the song as "def.all" to set these settings as the default
opening page.